5 Cold Frame Placement Mistakes That Kill Seedlings
Unboxed your new cold frame? Don’t just plonk it down. Getting the setup right is critical to actually extending your growing season, rather than ending up with cold-soaked, damp seedlings. In the next few minutes, we’ll walk you through choosing the perfect UK-specific spot, laying a solid foundation, assembling the frame without a backache, and keeping it humming from March to December. We’re aiming for a “Local Realist” approach here – working with our fickle UK light, wind, and rain, not chasing an impossible sun-bathing ideal. You can read more about our research here.
Where Should You Put Your Cold Frame for Best Results in the UK?
A sheltered south‑facing wall is often more effective for heat retention than a fully exposed south‑facing spot. The truth is, the UK’s overcast sky means a cold frame works by trapping whatever ambient warmth is available, so you need to maximise light and protect it from wind‑driven chill.

Aspect & Sunlight
South is the gold standard, but give yourself a little leeway. A south‑east orientation catches the early morning sun, which warms the soil before the Atlantic westerlies bring a damp spell. In many gardens a south‑west spot ends up overheating in July – you’ll be fighting a different problem later in the season.
Microclimates
A microclimate is simply a local pocket where temperature, moisture or wind differ from the surrounding garden. Brick walls, stone paving, or even a large shed retain heat during the day and release it slowly at night. Position the frame a metre or two away from a dark brick wall – close enough to benefit from the residual warmth, but far enough that the wall’s night‑time radiative cooling doesn’t chill the frame.
Most beginners discover this the hard way — a cold frame bolted against bare concrete loses heat through the base overnight, and seedlings end up with damping off before the first true leaves appear.
Small Garden Solutions
Got a narrow allotment plot or a balcony? Use the north side of a shed for shade‑loving herbs – they’ll thrive in the cooler micro‑climate there. For a tight patio, lean the frame against a fence and use a low‑profile trellis to create a vertical “green wall” behind it; the fence blocks wind while the trellis gives you extra planting space.
Wind & Rain
The prevailing westerlies can turn a gentle breeze into a wind tunnel that drives condensation inside the frame. Look for natural windbreaks – a hedge, a row of raised beds, or a sturdy garden wall. If nothing blocks the wind, set up a simple windscreen of garden fleece on the leeward side.
Quick Site Audit Checklist
Take a piece of paper (or your phone) and ask:
- Which wall gets the most sun before 10 am?
- Is there a solid, heat‑retaining surface within 1 m?
- Does the spot have a windbreak on the prevailing westerly side?
- Is the ground level, or will you need to add a base?
If you’re not sure whether your chosen spot ticks the boxes, Download the Free Checklist and compare notes.
How Do You Prepare the Foundation and Soil for a Cold Frame?
A level base is non‑negotiable; if the lid doesn’t close flush you lose the insulation effect and water will pool at the low point, inviting rot.
Leveling
Start by clearing a 1 m‑wide square of grass or debris. Use a spirit level on a short piece of timber to check the ground. If it’s uneven, lay a sand‑and‑gravel bed about 5 cm deep and tamp it flat. This creates a stable, slightly draining platform.
The Base
You have three sensible options:
- Paving slabs – cheap, readily available at B&Q or Wickes, and they provide a hard, level surface that stops grass from creeping in.
- Bricks – stack them in a shallow trench for a raised base; they’re easy to move if you need to re‑position later.
- Direct on lawn – works in a pinch, but expect grass to grow up into the frame and compete with seedlings. If you go this route, lay a sheet of weed‑blocking fabric first.
Most owners’ go‑to is a pair of reclaimed concrete pavers rescued from a neighbour’s driveway. They sit flat, keep the soil dry, and look tidy.
Soil Prep
Fill the frame with a blend of good quality compost (Garden Organic recommends a 50:50 mix of compost and loam) and a handful of sharp sand for drainage. If you’re using a wooden frame, drill a few 5 mm holes in the base to let excess water escape – otherwise you’ll end up with soggy roots and a rotting timber frame.
Dampness Control
Standing water is the enemy of both wood and seedlings. A simple trick is to line the bottom with a thin layer of coarse horticultural grit (about 2 cm). It speeds drainage and keeps the compost from compacting.
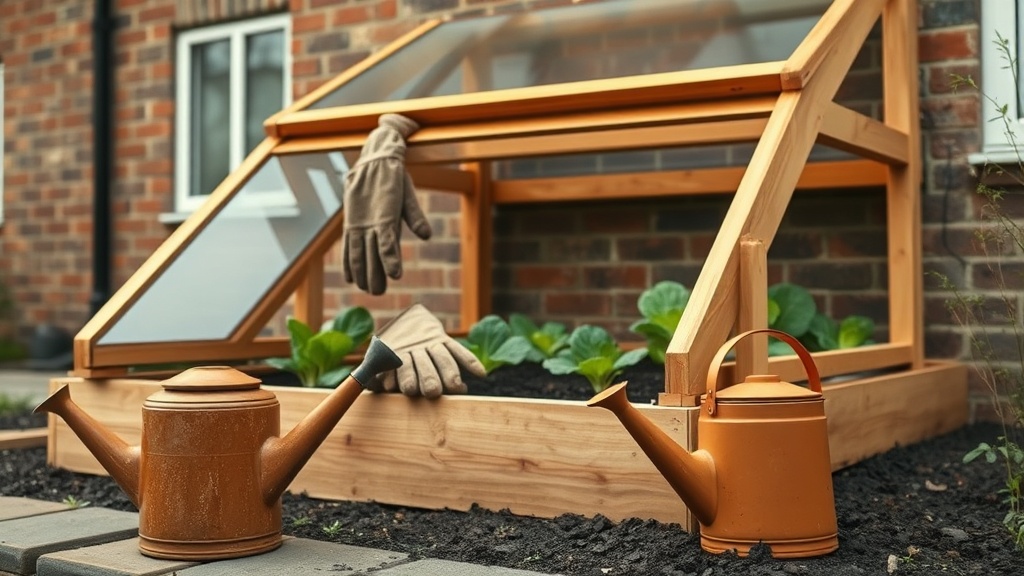
Assembly & Setup: Step‑by‑Step
Assemble the frame on a flat surface before you lug it to the garden – it saves a lot of back‑ache and prevents a half‑built mess on the lawn.
- Unbox & Parts Check – Make sure all hinges, clips and bolts are present. Missing a hinge later means a wobbling lid, and nobody wants that when the wind picks up.
- Build the Frame – Snap the side panels together first, using the supplied brackets. Tighten the bolts just enough to hold the shape; you’ll need a little wiggle room for the lid later. This flexibility helps when you’re lining things up.
- Attach the Lid – Line up the hinges, then secure them with the provided bolts. Most owners always tighten the bolts on the inside of the hinge first – it’s easier than reaching over the top later, especially if you’re working alone.
- Ventilation Setup – If your lid rolls up on a hinge, practice opening it fully and closing it again. You’ll be doing this several times a day in spring, so make sure it’s smooth.
- Secure the Frame – Drive a few garden stakes through the base into the ground, or place 10 kg sandbags on the lid’s corners if you’re on a windy site. This is a belt and braces approach that really helps on blustery days.
Most beginners once try to bolt the lid in place before moving the frame onto the garden bed. The whole thing tips over and they spend an hour righting it. Lesson: assemble first, then transport.
For a deeper dive into maintenance later on, see our guide on Cold Frame Maintenance.
Seasonal Use & Maintenance
A cold frame is a seasonal chameleon – you’ll need to tweak it as the weather swings.
Spring – Hardening Off
Start seedlings inside, then move them into the frame about two weeks before the last expected frost (Met Office data suggests around 1 May for most of England). Open the lid each morning for 30 minutes to let fresh air in – this prevents the dreaded “cotton‑wool” mould.
Summer – Avoid Overheating
By July, the sun can push internal temperatures 10 °C above ambient. Prop the lid open with a simple wooden stick, or drape a piece of garden fleece over the top to create shade. If you notice seedlings wilting, it’s a sign you need more airflow.
Autumn/Winter – Insulation Time
When night temperatures dip below –3 °C, line the inside of the frame with bubble wrap or horticultural fleece. It adds a few degrees of protection without blocking light. For hardy greens like kale and spinach, the frame acts as a windbreak and keeps the soil from freezing solid.
Maintenance Checklist
- End of season: scrape off any algae or mould from the glass/polycarbonate.
- Before winter: check hinges for rust – a quick wipe with WD‑40 does the trick.
- Spring start: give the frame a once‑over with a garden hose to remove dust that could block light.
For more winter‑specific tips, have a look at our Winter Gardening Tips.
Troubleshooting Common UK Issues
Condensation is usually a ventilation issue; opening the lid for an hour in the morning solves it. Here’s a quick rundown of the typical hiccups and how to fix them.
- Condensation: Water droplets on the inside mean the air is too humid. Open the lid for 10‑15 minutes at sunrise, or add a small vent at the top of the frame.
- Frost Damage: If you see blackened leaf edges overnight, cover the frame with a blanket or bubble wrap before the temperature falls below zero. Secure the covering with garden clips.
- Pests: Slugs love the damp environment. Place a few beer traps around the frame or scatter crushed eggshells on the soil surface.
- Damping Off: Seedlings that topple over are likely suffering from fungal rot. Ensure the soil is well‑draining, avoid over‑watering, and consider a light dusting of horticultural lime to raise pH slightly.
One neighbour swore by a tiny electric heater inside his frame, but the extra heat just made condensation worse. The simple fix? Better airflow – a cheap “vent” kit from a local DIY store did the trick.
Cold Frame Base Options
| Base Type | Pros | Cons |
|---|---|---|
| Paving Slabs | Hard, level surface; stops grass | Can be heavy to move |
| Bricks | Easy to move; raised base | Less stable than slabs |
| Direct on Lawn | Free | Grass competes with seedlings |
| Sand & Gravel | Drains well; flexible | Requires regular maintenance |
| Concrete Pavers | Durable; retains heat | Can be cold at night |
| Weed Membrane | Prevents weeds | Doesn’t provide structural support |
| Horticultural Grit | Excellent drainage | Doesn’t provide structural support |