Beat the Heat in Your Cold Frame
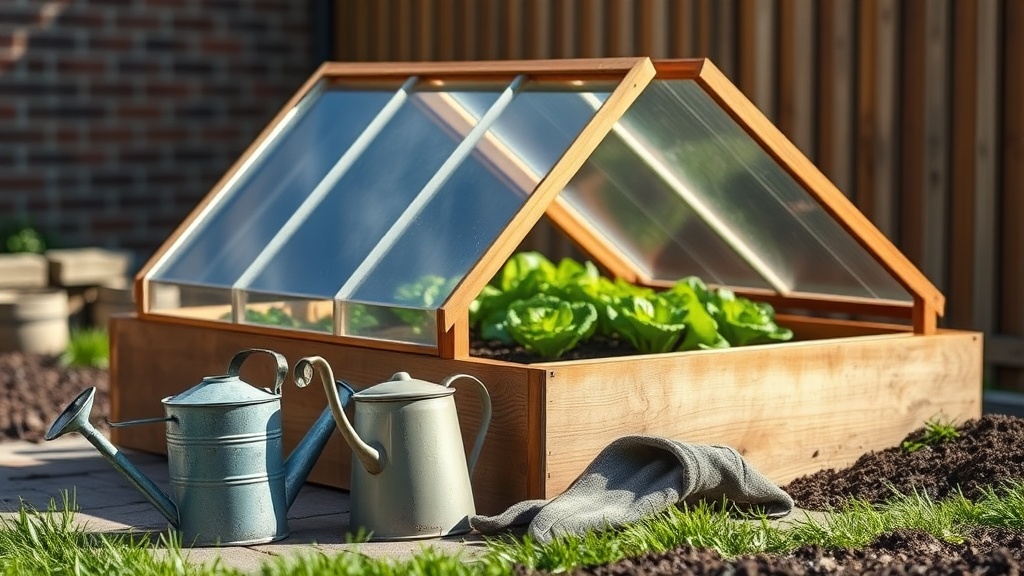
Wilted seedlings or mouldy leaves are the tell-tale signs of a cold frame gone wrong. It’s frustrating when you’ve invested in a frame to extend your season, only to find it cooking your crops in summer or letting damping-off take hold in spring. The truth is, a cold frame is a miniature greenhouse. In the UK, a closed one can quickly hit temperatures 20 °C higher than outside, creating a perfect storm for scorched plants or damp-loving diseases. Proper ventilation isn’t just about opening the lid; it’s a seasonal strategy, adapting to the weather and your frame’s material. Here’s how to keep your cold frame breathing – and your crops thriving, even when you’re not around. (If you’re still on the fence about building a frame, check out our Cold Frame Setup guide first.)
The Physics of a Cold Frame
A cold frame needs proper ventilation to prevent overheating and damp, which can quickly kill seedlings. It works by trapping solar energy, similar to a greenhouse; sunlight enters, heats the soil and plants, then re-radiates as heat that struggles to escape the glazed roof. This trapped heat, combined with water vapour released by plants (transpiration), creates a humid, often excessively warm micro-climate. Without regular airflow, temperatures can soar, scorching plants, while high humidity leads to mould and ‘damping-off’ disease. Opening the lid, even slightly, allows warm, moist air to escape and cooler, drier air to enter, regulating both temperature and humidity.
Glass vs. polycarbonate: Glass lets in more solar energy and retains heat longer, but it shatters if you’re unlucky with a rogue branch. Polycarbonate is lighter, shatter‑resistant, and diffuses light, meaning the temperature rise is a touch slower – handy on a scorching August day. Thompson & Morgan list polycarbonate panels at roughly £30‑£45 per square metre, a price that’s “worth its salt” for most hobby gardeners.
The RHS points out that condensation inside a cold frame is essentially “the honest answer is that you’ve got a tiny greenhouse with its own weather system” – if the humidity isn’t vented, you’ll see white fuzzy mould (damping‑off) on seedlings within days of a damp spring. Keeping an eye on airflow is crucial, as Garden Organic often stresses for healthy, disease-free growing.
So, temperature and humidity are twins you must manage together. The only way to do that is with airflow.
How Does Cold Frame Ventilation Actually Work?
The lid is the main vent. When you tilt it even a few centimetres, warm air – being lighter – rushes out, and cooler, drier air rushes in from below. That exchange drops both temperature and humidity.
The “crack” method: On mild days (outside 10‑15 °C), a small gap – about the width of a thumb – lets enough air circulate to keep the interior from overheating while still retaining some warmth for seedlings.
Full open rule: When the thermometer hits 25 °C inside, or the sky is blazing, swing the lid fully open. That’s the only way to bring the temperature back down quickly.
Side vents: Some frames have side louvres; they work, but the lid still provides the biggest airflow because hot air naturally rises.
Do’s and Don’ts
- Do open the lid before the sun hits hard – early morning is best.
- Do check the gap after a rain shower; a closed lid traps moisture fast.
- Don’t wait until leaves look wilted – the damage is already done.
- Don’t leave the lid flapping in a strong wind; it can tear the glazing.
Seasonal Strategy: Spring vs. Summer
The UK’s climate swings dramatically between a damp, chilly spring and a sometimes‑scorching summer, as anyone following the Met Office forecasts knows. Your ventilation plan should mirror that swing.
Spring – the damp season
- Morning: Open the lid fully for the first 30 minutes, then prop it open just enough to keep a gentle draft.
- Mid‑day: If the sun is bright, keep the lid cracked; if it’s overcast, keep it fully open to let humidity escape.
- Evening: Close the lid once the temperature drops below 10 °C to protect seedlings from night frost.
Summer – the heat season
- Early morning: Keep the lid fully open until the temperature inside stabilises (usually by 9 am).
- Mid‑day: If a heatwave pushes the inside above 30 °C, prop the lid open with a brick or bottle (see hacks below).
- Evening: Close the lid once the night falls below 15 °C to retain warmth for hardening‑off seedlings.
Autumn/Winter – the cold season
- Keep the lid closed to trap residual heat, but check for mould every few days. If you spot white fuzz, give it a quick breath of air.
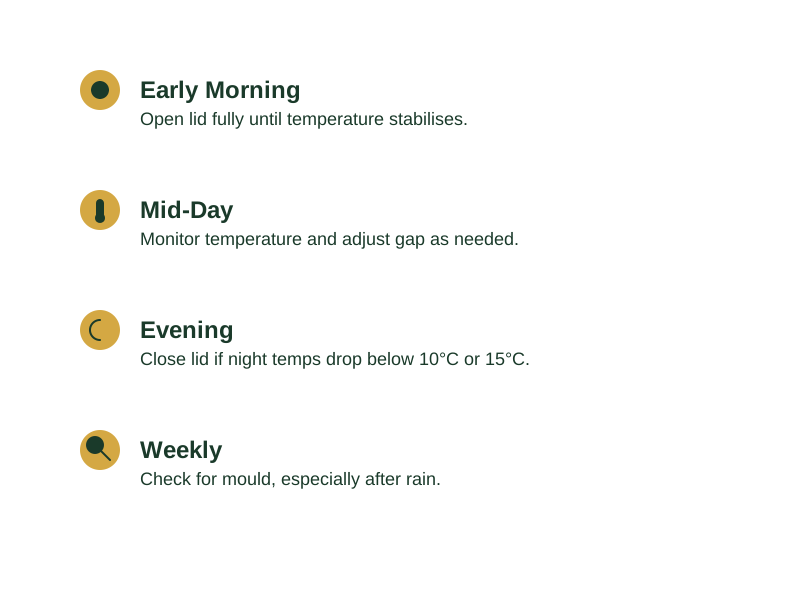
Seasonal checklist
- Morning crack or full open (spring → crack, summer → full)
- Mid‑day monitor temperature; adjust gap as needed
- Evening close if night temps < 10 °C (spring) or < 15 °C (autumn)
- Weekly mould inspection, especially after rain
If you’re unsure which step to take today, Download the Free Checklist – it walks you through the exact opening times for any UK weather forecast.
For deeper frost protection, see our guide on Winter Cold Frame Protection.
The “Manual Ventilation Trap” & Hacks
Here’s the thing: most of us are at work 9‑5, so we can’t be there to pop the lid every hour. That’s the “manual ventilation trap” – you set the frame, then forget to adjust it, and the plants pay the price.
Simple prop solutions (no‑cost, no‑tools)
- Plastic bottle prop – Fill a 500 ml bottle with water, place it on the edge of the lid, and lean the lid against it. The water absorbs heat by day and releases it slowly at night, keeping a gentle draft without a constant manual tweak.
- Brick or concrete block – Lay a brick under one side of the lid to hold it at a fixed angle (about 15°). It’s sturdy, cheap, and you can move it when the weather changes.
- Old wooden plank – A thin board can act as a hinge, allowing you to set the lid at any opening width you like.
Step‑by‑step: how to prop the lid with a bottle
- Choose a sturdy bottle. PET (polyethylene terephthalate) plastic bottles work best as they’re rigid enough.
- Fill it three‑quarters full of water. The water adds weight for stability and helps absorb heat.
- Position the bottle. Place it on the frame’s lower rail, near the centre, where it can support the lid evenly.
- Lean the lid against the bottle. Adjust the lid until it stays open at the desired crack or angle, letting air circulate.
- Check the angle. After the first sunny day, check the opening. Adjust if the wind pushes the lid or if you need more/less airflow.
Most beginners learn this the hard way when their first frame’s lid is welded shut with rusted hinges – a bit of a faff to fix, but the simple bottle hack saves their lettuce that summer. If you want to know a bit more about our research journey from a single cold frame to a full-on polytunnel, check out our About page.
Automatic vent openers exist, but they’re a premium option that often fails in the first season. For most UK gardeners, a brick or bottle does the trick and won’t break the bank.
Troubleshooting: Signs of Heat Stress & Mold
When things go wrong, the symptoms are usually obvious – you just need to know what they mean.
| Symptom | Likely Cause | Quick Fix |
|---|---|---|
| Leaves wilt, turn crisp, brown edges | Temperature > 30 °C, lid closed | Open lid fully, add shade cloth if sun is intense |
| Seedlings tip over, stem‑lesse, “floppy” look | Over‑watering + poor airflow, damp off | Prop lid open, improve drainage, remove affected seedlings |
| White fuzzy growth on soil surface | High humidity, poor ventilation | Open lid for several hours, wipe away mould, increase airflow |
| Soil crusts, hard, dry patches | Lid open too long, excessive drying | Close lid slightly, mist soil lightly, add mulch |
If you spot wilting early in the morning, it’s almost always a ventilation issue – the heat built up overnight because the lid stayed shut. The cure is immediate: swing the lid open, give the plants a breath of fresh air, and consider a prop for the rest of the day.
Maintenance: Keeping Vents Working
A vent that sticks is a vent that kills. Spend a few minutes each month to keep things moving smoothly.
- Inspect hinges and latches for rust – a little WD‑40 (or a home‑made vegetable oil spray) does the trick in the damp UK climate.
- Clear debris – leaves, cobwebs, or seed husks can jam side vents; a quick brush‑off keeps the airflow free.
- Lubricate moving parts if they feel stiff; a few drops of silicone spray are enough.
A well‑maintained frame will last years, and you’ll avoid the dreaded “lid won’t open” panic on a hot July day.