How to Seal Greenhouse Doors and Vents
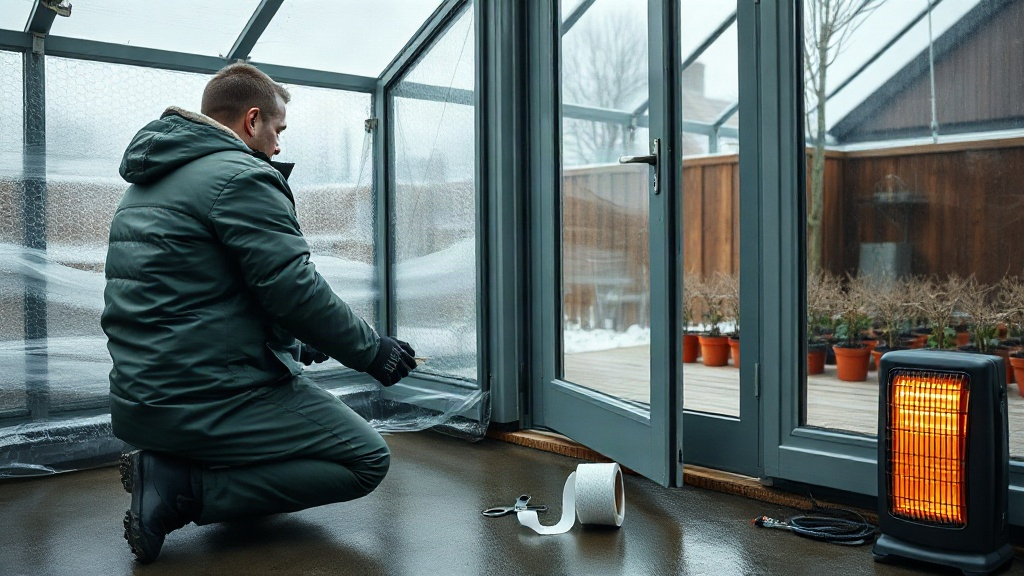
On the next windy day, hold a wet hand or a thin strip of tissue along the edges of your greenhouse door and vents. Anywhere you feel a draught or see the paper move is where heat is escaping and wind is stressing the frame. This simple check reveals the gaps that make the difference between a stable environment and one that leaves plants vulnerable.
Most people notice the temperature drop but miss the structural risk. A poorly sealed door acts as a sail in strong winds, transferring load to a frame not designed for that flex. According to RHS guidance, greenhouse doors and vents should fit snugly, with seals helping to reduce heat loss. The critical point often overlooked is that the seal itself is a structural component, transferring load from the door panel into the frame. Get it wrong, and you alter how your greenhouse behaves in a gale.
This guide covers the proper way to seal doors and vents, explaining why model-specific parts matter and what else needs attention for a frost-free, wind-resistant structure through a British winter.
The real cost of a drafty door
Temperature fluctuation is the obvious issue. On a clear winter night, an unheated greenhouse naturally cools, but draughts accelerating through gaps push plants over the frost-tolerance edge and dry the air. The less obvious problem is structural. Wind creates pressure differentials; a poor seal allows the door panel to flex under load. While aluminium frames are strong, their jointed extrusion system is where failure begins. The Keder Greenhouse guide emphasises that secure, well-sealed doors allow you to control airflow. Without that control, a storm can stress the door channel, hinges, and glazing seals, potentially loosening the frame from its base over time.
Blocking vents entirely is a common mistake. Even in winter, sunny days can push interior temperatures to 20°C or more. Without ventilation, this leads to high humidity and grey mould (Botrytis), often more damaging than a light frost. The aim is controllable draughts, not a complete seal.
A greenhouse heater only earns its running cost in a sealed house.
Selecting the correct seal for your greenhouse model
Avoid universal door weather seals unless you have a confirmed Halls model—and even then, you must know which Halls type. A greenhouse door seal is shaped to fit a specific aluminium profile. A generic seal might be the right material (EPDM rubber) but the wrong profile, leaving gaps at the corners.
Halls, a common UK brand, uses different seal profiles across its range. Halls specify their rubber door seals by model: the Magnum takes two pieces each 1958mm long (part number 00333), while most other Halls greenhouses take two pieces each 1683mm long (source: Halls Greenhouses). Ordering the wrong length results in a poor fit.
Crittall and Baco frames have proprietary seal profiles that serve a structural function, maintaining panel system integrity under load. A generic seal won’t fit. Sourcing genuine components ensures the frame’s wind-loading specifications remain intact, as the structure was tested with those specific parts.
The practical approach:
- Confirmed Halls model: The Halls Door Maintenance Kit (approx. £19) includes the door seal plus associated components like wheels and sliders (source: Halls Greenhouses). For the door only, the Halls Rubber Door Seal is around £10.
- Crittall or Baco greenhouse: Source their specific seals; no universal option exists.
- Other brands (Elite, Vitavia, Rhino): Check with the manufacturer or a specialist supplier first. Generic seals are not a safe shortcut.
A £10 generic seal from a DIY store might use the same rubber, but the geometry likely won’t match. For non-Halls greenhouses, it’s a gamble with structural integrity.
Comparing common greenhouse brands
Halls greenhouses are widely sold through UK garden retailers. Crittall frames are often found in commercial horticulture and older installations. Elite, Vitavia, and Rhino are mid-range consumer brands with their own spare parts networks. If your greenhouse is inherited or from a lesser-known source, identify the manufacturer before ordering.
Addressing vents, wheels, and structural points
A draught-free greenhouse requires attention beyond the door. These fixes are typically cheap and prevent larger issues.
Door wheels wear over time, altering the door’s angle and breaking the seal even with new rubber. Replacement wheels must match the original diameter. The Halls Door Slider (part number 437N, approx. £16.50) is the specific component for Halls models (source: Halls Greenhouses).
Vent stay pegs hold roof vents at the set angle, preventing wind from slamming them shut or blowing them open. They cost very little and are crucial for autumn ventilation control.
Eaves joints connect roof glazing bars to side frames, handling concentrated wind load at the roofline. Halls left-hand and right-hand eaves joints (approx. £11.50–£12.50 each) are inexpensive insurance.
Anchor stakes (approx. £3 each) bolt the base to the ground, resisting wind uplift—a key measure against storms lifting lightweight structures.
Glazing tape seals panels to the frame, degrading with UV exposure. When it fails, moisture accelerates aluminium corrosion. Quality glazing tape is a worthwhile part of winter prep.
Nut protectors prevent corrosion on frame bolts, ensuring the structure can be dismantled later.
Signs you need more than a door seal:
- Frame rattling in moderate wind
- Cold draughts at multiple points
- Door sitting crooked in its track
- Water ingress around glazing
- Cracked panel clips or glazing seals
If these apply, survey the full frame before winter. The maker’s own spares list is the place for a replacement glazing bar or vent stay; a generic seal is a different part.
Installing a weather-proof seal correctly
Replacing a door seal is a straightforward job taking under an hour with basic tools.
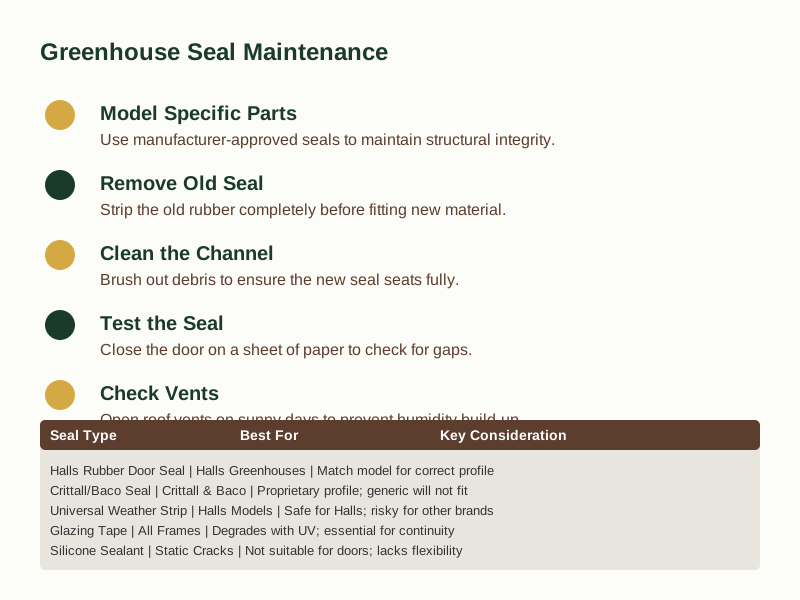
Remove the old seal completely—don’t layer over it. Use a flat-blade screwdriver to work it out, then clean the channel thoroughly. Any debris prevents the new seal seating properly.
For rubber seals with a ‘fin’, start at the top corner, seat the fin fully, and work your way down one side, across the bottom, and up the other. The rubber will stretch slightly. Trim any excess and butt the ends together.
Test the seal by closing the door on a sheet of paper (a £5 note works well). Pull the paper out; resistance indicates a good seal. Test at multiple points around the frame. This simple method reliably checks integrity.
When replacing door wheels, be careful not to overtighten aluminium threads, which strip easily. Stop when the fastener is firm.
Remember ventilation: even with a new seal, open roof vents on sunny days above about 10°C inside. The seal keeps cold out when needed; vents release excess heat and humidity.
The insulation around that sealed frame is the other half of the job, in how to insulate a greenhouse for winter .
Seal types and their uses
| Seal Type | Best For | Key Consideration |
|---|---|---|
| Halls Rubber Door Seal | Halls Greenhouses | Match model (Magnum vs Standard) for correct length and profile |
| Crittall/Baco Seal | Crittall & Baco Frames | Proprietary profile; generic seals will not fit |
| Universal Weather Strip | Halls Models Only | Safe for Halls due to well-known profile; risky for other brands |
| Glazing Tape | All Frame Types | Degrades with UV exposure; essential for panel-to-frame continuity |
| Silicone Sealant | Static Cracks | Not suitable for door seals due to lack of flexibility |
| Door Maintenance Kit | Halls Greenhouses | Includes seal, wheels, and sliders; cost-effective for worn doors |
Sealing as a prerequisite for insulation and heating
Properly sealing doors and vents is the step that determines whether your insulation and heating efforts are worthwhile. A poorly sealed structure undermines both, wasting energy and leaving plants at risk. The right model-specific part matters more than a quick generic fix.
Silicone works for static cracks in glazing or frame bases but isn’t suitable for doors. It lacks the flexibility needed for opening and closing, cracking within a season. Use the correct rubber profile for the door; silicone elsewhere. Inspect seals annually in early autumn and replace if cracked, compressed, or no longer springy. UV and temperature cycles degrade EPDM rubber. If you see daylight through the gap when closed, it’s time for a new one. Provided you use the vents, sealing improves cold-weather efficiency without causing summer overheating. On sunny days above 10°C inside, open roof vents to prevent overheating. The RHS advises functional ventilation year-round. Think of the seal as winter insulation; vents are for summer. If the door is old with sticking or sagging issues, a maintenance kit is cost-effective. A Halls Door Maintenance Kit (approx. £19) includes the seal plus commonly worn components. For a relatively new door with only seal wear, the seal alone suffices. To secure a greenhouse against high winds, start with anchor stakes to bolt the frame to the ground. Check eaves joints are tight. Ensure glazing tape is intact. Avoid stacking heavy items asymmetrically against walls. In exposed areas, consider a windbreak on the prevailing wind side.
Once air leakage is solved, the next logical step is to ensure the thermal envelope is complete. Our parent guide, How to Insulate a Greenhouse for Winter UK , covers the comprehensive approach to winter preparation.
References
Note: General guidance only. Always verify specific part requirements with the manufacturer of your greenhouse structure.